Wedding Party Hangers
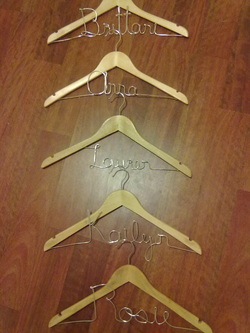
After seeing these all over planning websites, I decided I wanted to try them. At first, it was a giant failure because I used 16gauge wire.
Don't do that. I promise - you'd think thicker wire would be harder, but it flows so much easier.
Supplies
PS: Sorry for the horrible quality, not very helpful, needed-another-pair-of-hands pictures!
Don't do that. I promise - you'd think thicker wire would be harder, but it flows so much easier.
Supplies
- 12 gauge floral wire from Joann's Fabrics- 5yards for $2.99 (for me, 5 yards made approx. 4 names)
- Wooden shirt hangers from Walmart - 5pack for $4.24
- Needle-nose or round-nose pliers - $5.00
- Hot glue gun (if you don't already have one) you don't need a very nice one, and you can find them online at about $2.00
PS: Sorry for the horrible quality, not very helpful, needed-another-pair-of-hands pictures!
Instructions
- Choose which name you'll start with. I advise a shorter name, not the bridesmaid with 9-letters in her name that you happen to have (everyone's got one).
- Write out the name as if you're using the wire (don't pick the pen up off the paper). Sticking with script letters will usually make it easier on you. In this picture, you can see that I went over the "o" a few times to see which form would be easiest to use.
Decide how big you want the letters, and place the hanger over the paper to see how the name will fit. - Un-roll about 1 foot of the wire from the roll and bend it to form your first letter. If you need to make a sharp edge or a tight turn with the wire, use the pliers, otherwise using your fingers will work and wont kink the wire.
- Bring the wire back down to the "base" of the first letter - where the letters will sort of rest in midair. If the first letter doesn't do this naturally, think ahead to where the next letter to connect. Start on the next letter, and continue until you've finished. Keep about a foot of wire unrolled the whole time, any more will be too much weight for the wire to handle and any less will be frustrating because you'll have to pause to unroll frequently.
- For tricky things, like doubling back. making multiple layers, or connecting funny letters, the best method is trial and error. My "L" at the beginning of Lauren was the only letter that connected to the hanger from the top of the letter, not the bottom. It took me about 6 tries to figure out this was the easiest way. My capital "As" also took hours to not look like Os.
- Once you've finished your name, center it on the hanger and trim off the end, leaving enough wire on each side to connect to the hanger.
- Now that you have each side of the name free of the wire roll, line it up with the inside edges of the hanger and mark the spots where it meets the wood with a sharpie or pen. Hot glue these spots, apply the wire ends quickly, and add a bit of hot glue over the wire as well. Try not to ball it up so it's huge, but a little glue won't be noticeable.
- Allow to dry, and, ta-da! You have a personalized name hanger!! If you'd like, add a little flourish like ribbons in your colors or a pattern on the wood. Your choice!
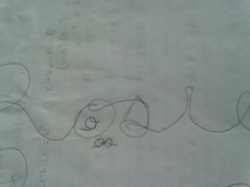
Step 2
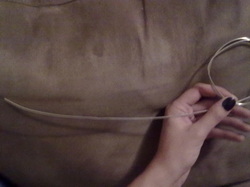
Step 3/4
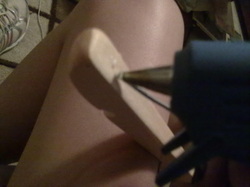
Step 7
